

Change Photo to Line Drawing Free Download
There are various options to get the desired look you want, but the steps to be followed are largely similar.
So, we'll be covering the list of things you need to do for using the Sketch Drawer software, and also the different styles and presets inside it. Don't worry, we'll learn more details about the conversion styles in the next section, with examples!
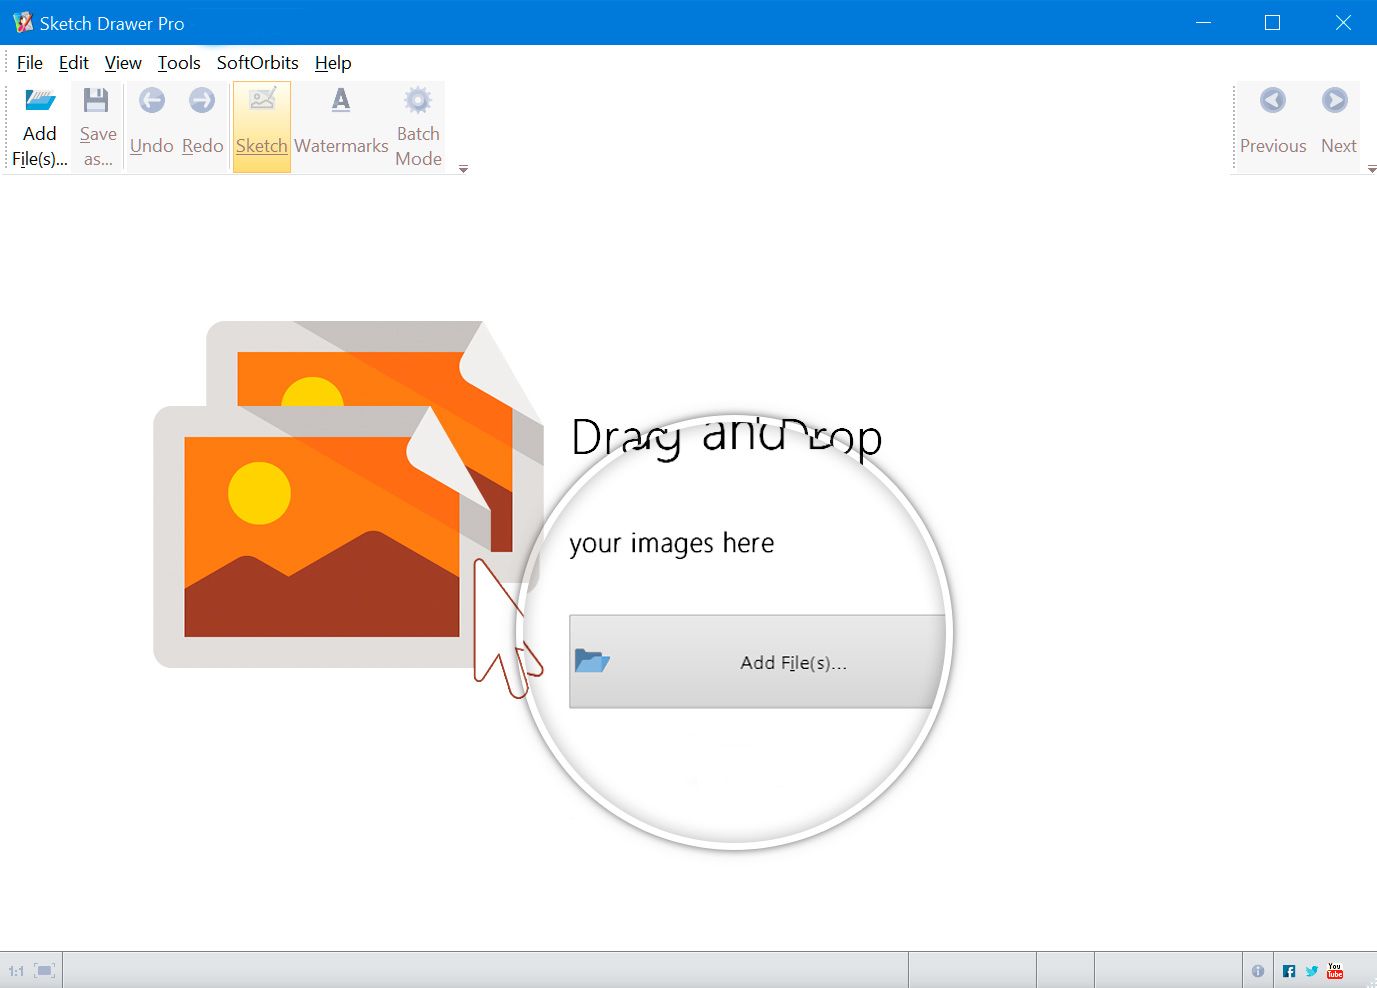
Add File
On opening the program, you will see an option Add File . Use this to upload your photo, either by browsing through your files or simply dragging and dropping.
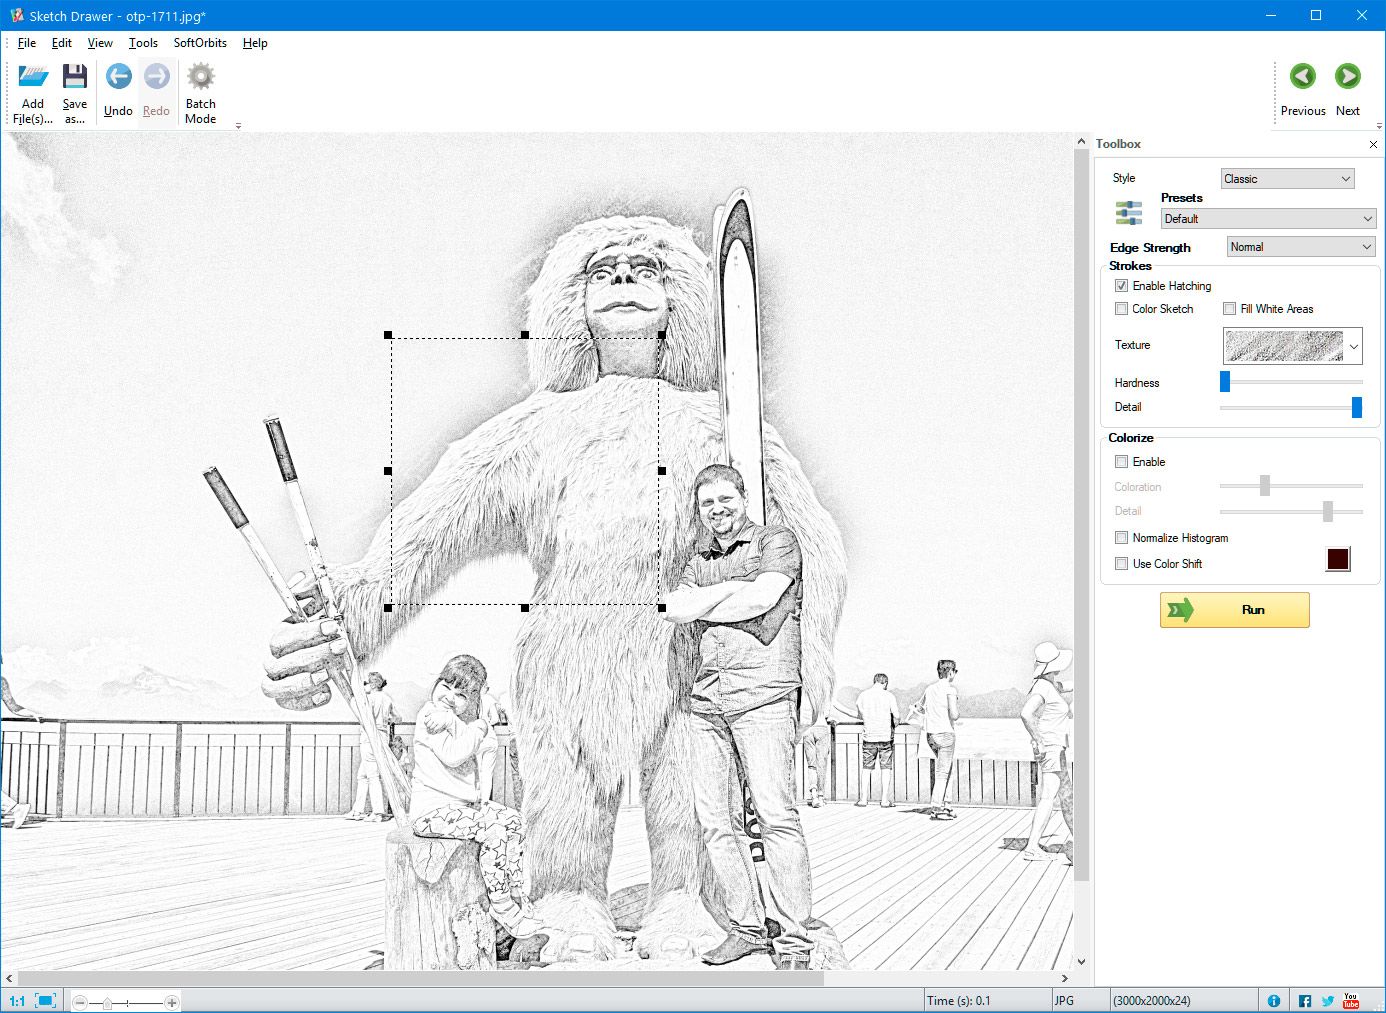
Sketch Style
Sketch Drawer has a toolbox on the top right side, where you can select one of the three options under Style - Realistic, Classic or Detailed Sketch.
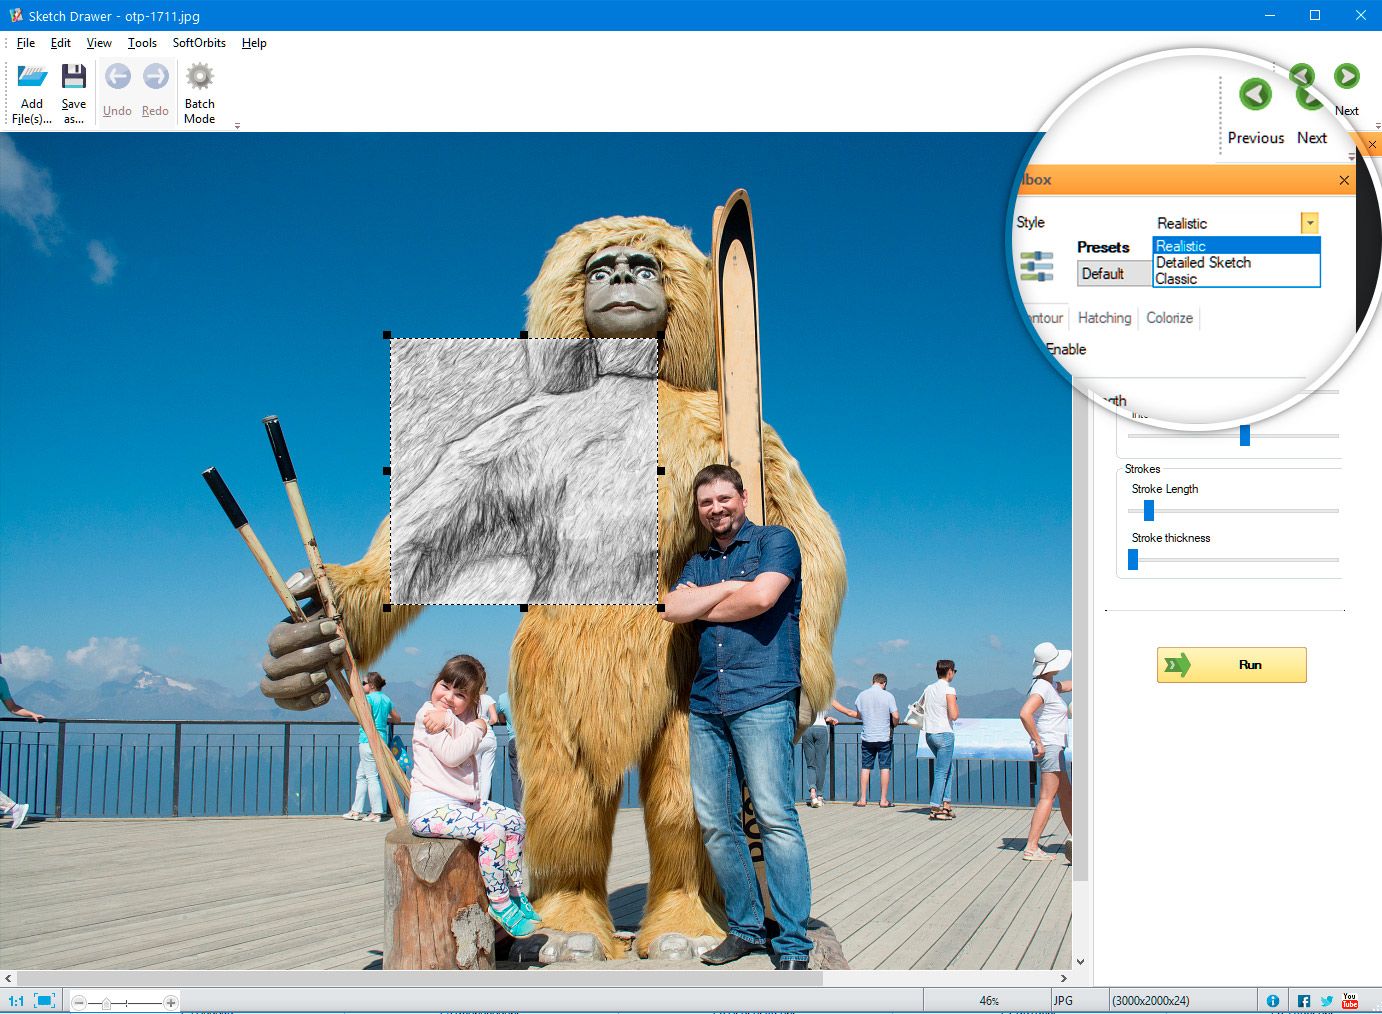
Each of the three styles has its own distinct look, and you should try them all out to see which one works best. To make things easier, Sketch Drawer shows a preview of what your final image will look like, so you can try every option in a second and get a sample of the final result!
Realistic style works well for capturing the overall details and adding pencil shading to the final result. It works well for close-up portrait shots and still life images.
Detailed Sketch, on the other hand, works well when you want to emphasize a lot of detail and create a carbon copy of the image. While good for landscape images, it might not be suitable for portrait shots, which look better when subtle.
The Classic option gives a very minimalist appearance, with soft pencil strokes and less shading. You should use this if you want a simple natural-looking result, and not something that was created by a perfect computer!
Select Preset
The style decides the overall look of the converted image – whether it will be detailed or realistic or classic minimal.
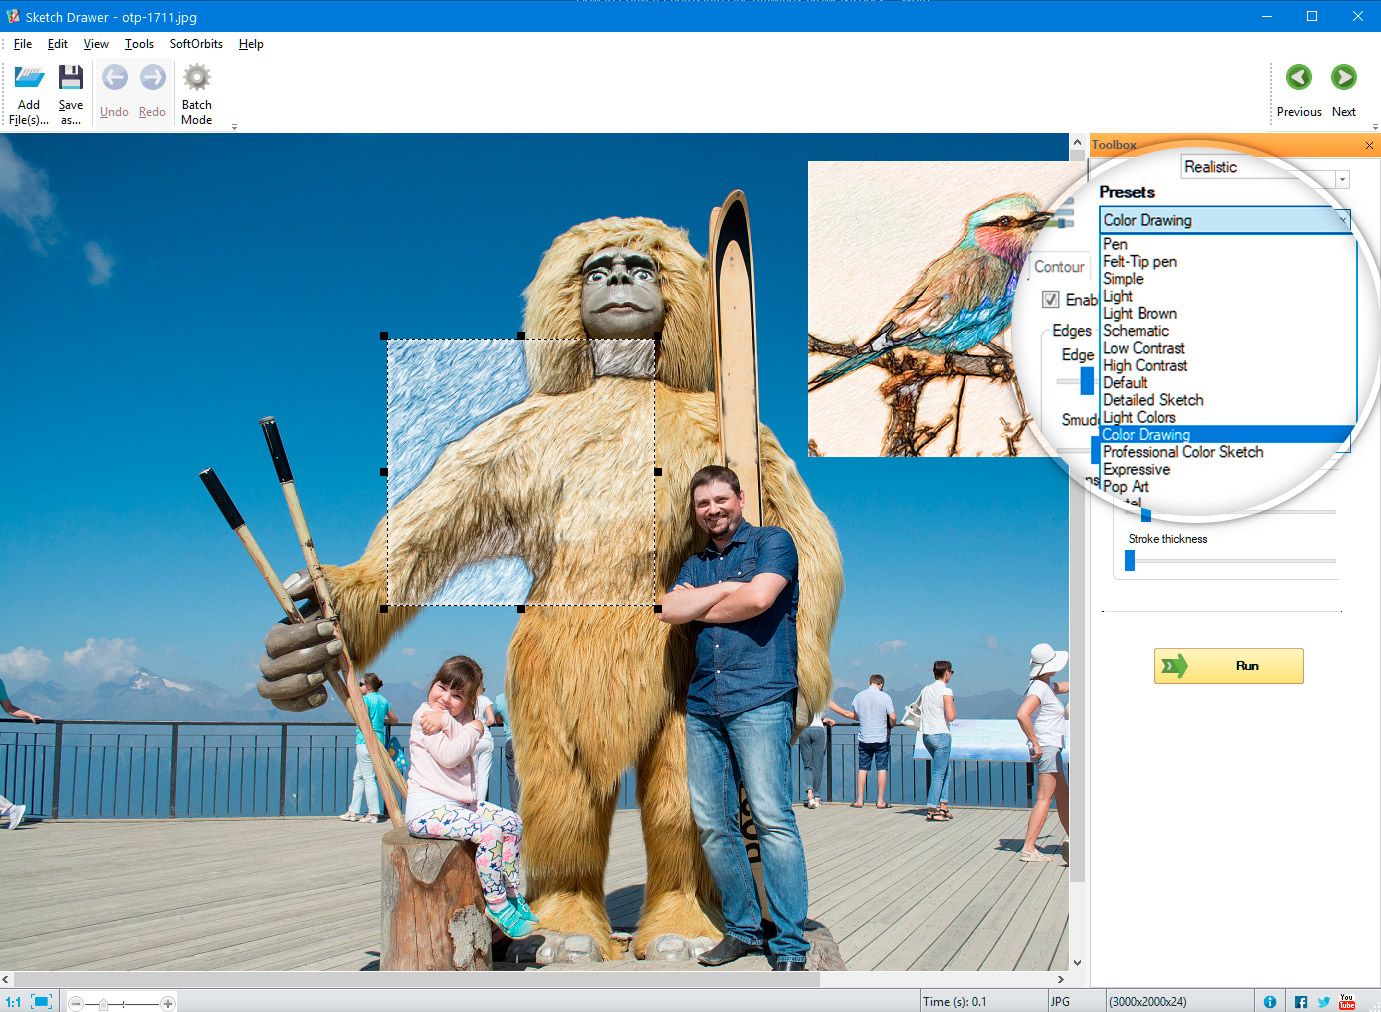
The Preset on the other hand decides the appearance itself – whether there will be any colour, the amount of shading involved, whether the look will be like water colours or pencil drawing etc. And there are loads of options to choose from!
The Preset option can be found on the right side, below the Style option. Sketch Drawer gives multiple presets like Felt tip pen, colour drawing, pop art, low contrast sketch, high contrast sketch etc. You will get a preview of each one as you hover with your mouse pointer over it and move around the list!
We'll discuss more about the various presets and what they do once we go through all the steps.
Adjust Sketch settings
You are half done! After selecting the overall style and the preset to be applied, you can fine tune all the settings using three options – Contour, Hatching and Colourization.
There's a box below the Preset option which allows you to enable the above three options.
Let's take a look at what they do!
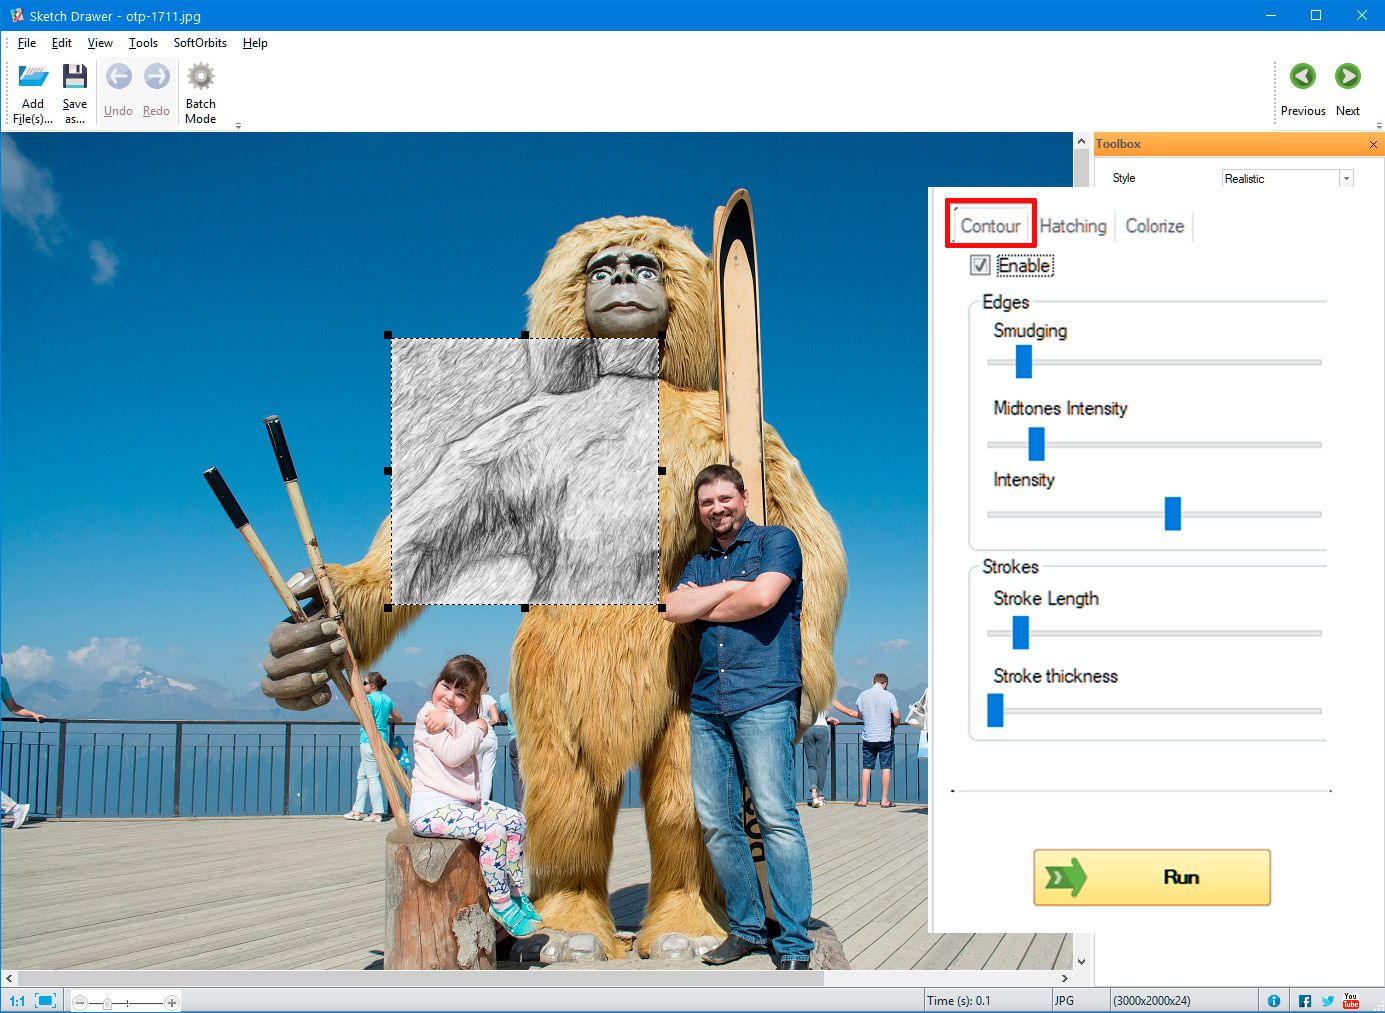
Contour Settings
On enabling the Contour settings, you can control edge strength, smudging and even the thickness and intensity of the pencil strokes used. By increasing the edge strength, Sketch Drawer will put more emphasis on the outlines of the photo, giving you the best line drawing possible.
You should try adjusting the stroke thickness too, so that you can get bold lines which highlight the outlines of your subject.
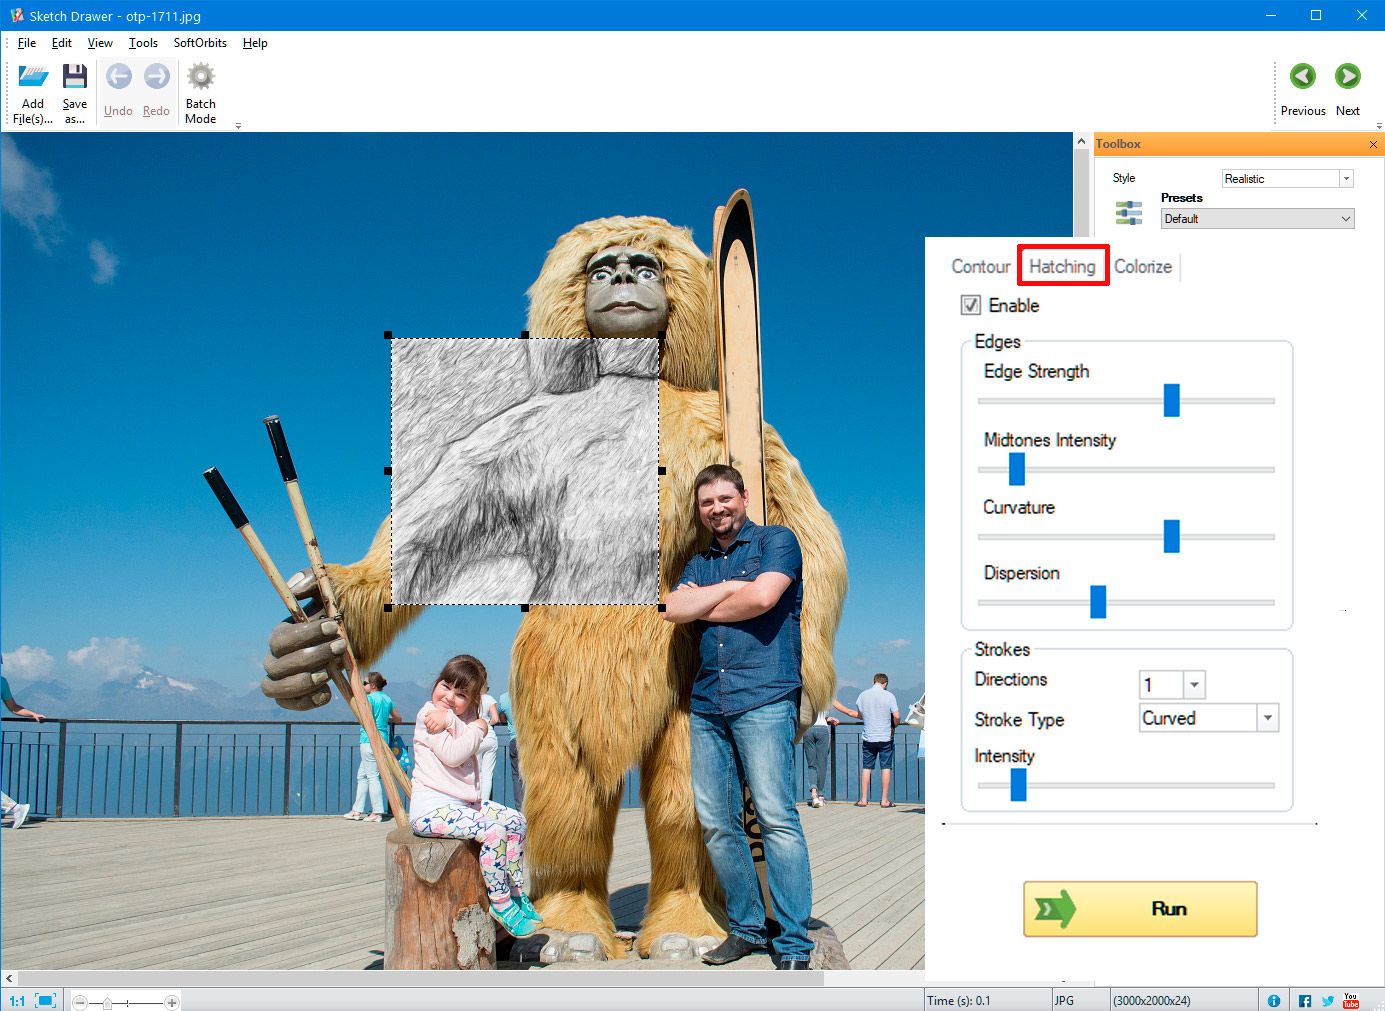
Hatching Settings
Hatching is actually the zig-zag, crossed lines which fill the white space in the sketch. It creates a pencil shading effect, with dark areas having more hatching to create shadows.
You can adjust the look of hatching as per your liking! By increasing the edge strength, you will again emphasize shading at the borders, leaving more empty space in your photo.
You also get the option of adjusting midtone intensity here, which will decide whether areas with moderate light – not too dark, nor too bright – are also given the shading effect or not.
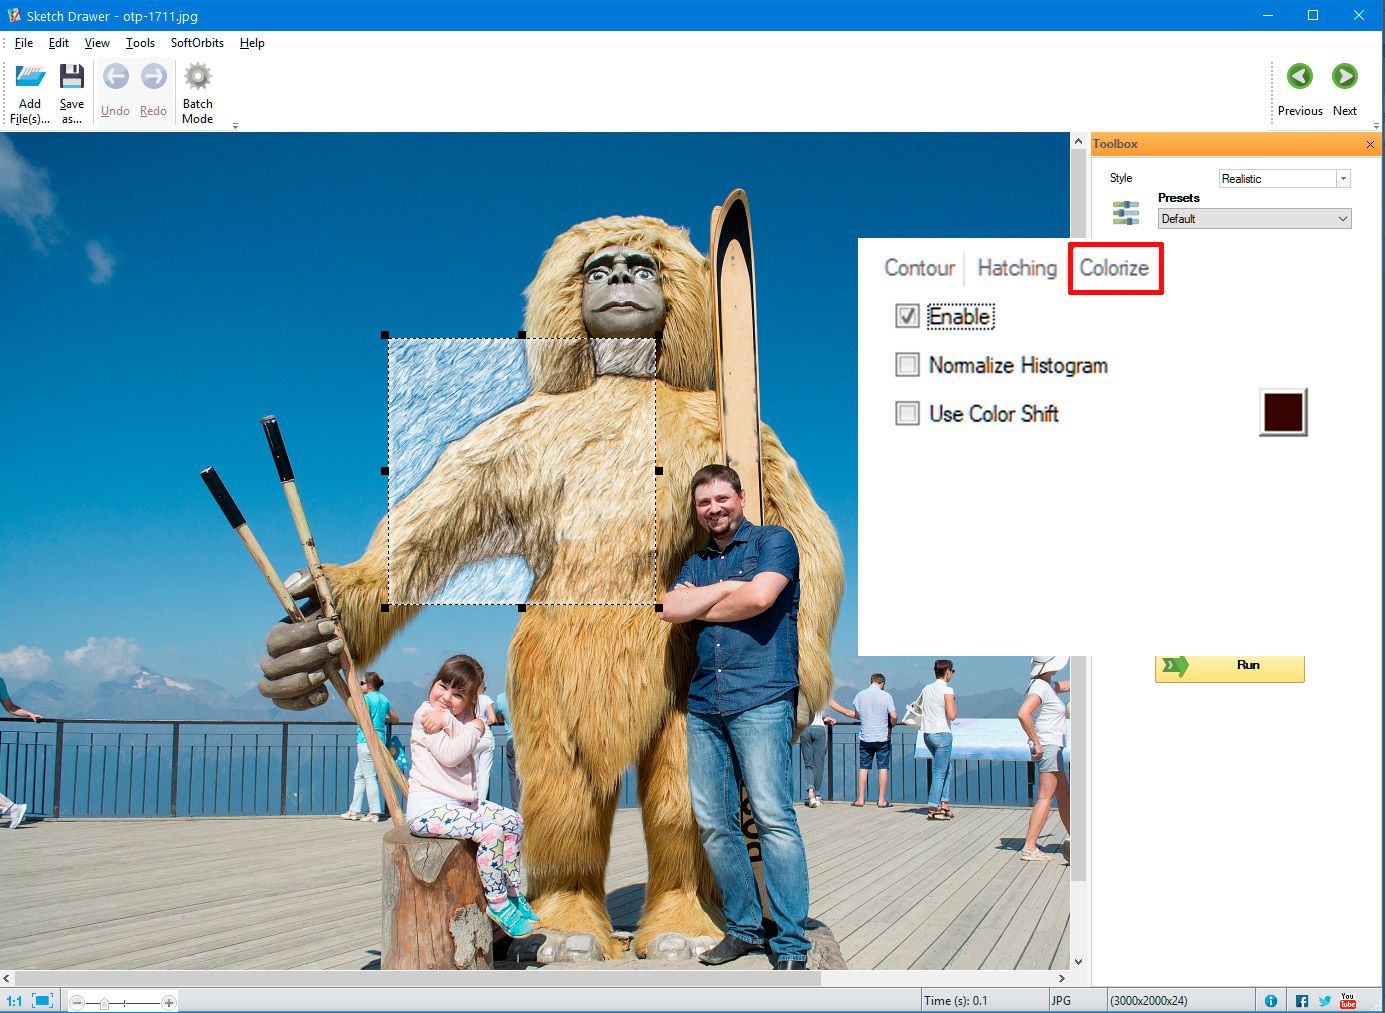
Colourization settings
This is probably the most fun option to use!
On enabling the colourization setting, you can decide whether you want the line drawing to be a black and white sketch, or have some colour. Sketch Drawer even lets you decide which colour is used for converting the image into a sketch!
Save image
Click on the Run option at the bottom right side to convert the full image into a sketch.
Once you are satisfied with the way the strokes and shading appear, you can click on Save File at the toolbar on top. Your drawing is ready in five simple steps!
Change Photo to Line Drawing Free Download
Source: https://www.softorbits.net/how-to/convert-photo-to-line-art.html
0 Response to "Change Photo to Line Drawing Free Download"
Post a Comment